How to Make a Baffle for Motorcycle Exhaust Guide 2026

This 2026 guide provides a comprehensive, step-by-step approach to help you confidently make a baffle for your motorcycle exhaust. Whether you aim to reduce noise, comply with local regulations, or fine-tune your bike’s sound, you’ll learn everything from gathering materials to final installation. We cover essential tools, precise measurements, and crucial safety tips to ensure a successful DIY project, helping you achieve the perfect exhaust note.
How to Make a Baffle for Motorcycle Exhaust 2026 Guide
Hey there, fellow rider! Ever wish your motorcycle’s roar was a little less… roaring? Or maybe you’re looking to comply with local noise ordinances without sacrificing too much performance? Well, you’ve come to the right place. In this 2026 guide, we’re going to walk you through exactly how to make a baffle for motorcycle exhaust yourself. It’s a rewarding DIY project that lets you fine-tune your bike’s sound and, believe it or not, can even subtly affect its performance.
Creating your own motorcycle baffle isn’t just about saving a few bucks; it’s about customizing your ride to perfection. By the end of this guide, you’ll have the knowledge and confidence to build a functional, effective baffle that suits your specific needs. Let’s get those hands dirty!
What is a Motorcycle Exhaust Baffle and Why Make One?
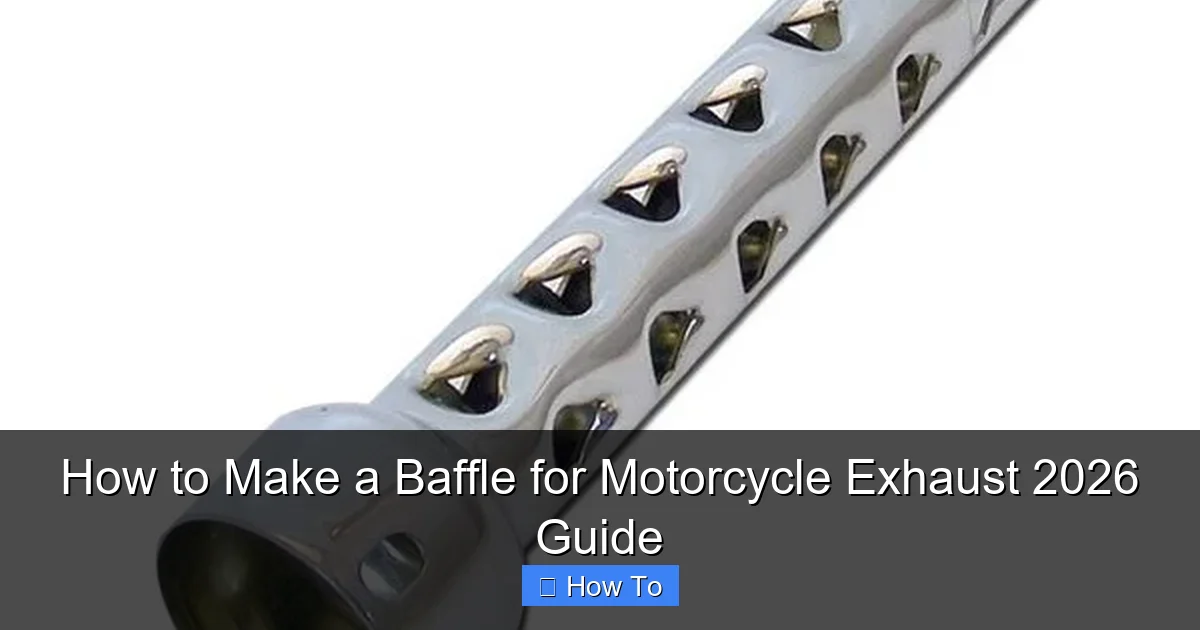
Before we dive into the nitty-gritty, let’s quickly clarify what an exhaust baffle is. Simply put, a baffle is a device inside your exhaust pipe designed to reduce sound by disrupting the flow of exhaust gases. It does this by creating turbulence, reflecting sound waves, and often using sound-absorbing material.
Why make your own?
- Noise Reduction: The most common reason. Many aftermarket exhausts are incredibly loud, and a custom baffle can bring the volume down to a more comfortable, legal, and neighbor-friendly level.
- Performance Tuning: Baffles create back pressure. While too much can choke your engine, the right amount can actually improve low-end torque. Understanding how a motorcycle engine works, you’ll know that exhaust flow is critical.
- Cost Savings: Custom or aftermarket baffles can be pricey. DIY is often significantly cheaper.
- Customization: You get to control the exact sound and performance characteristics.
- Compliance: Local laws about motorcycle exhaust noise vary. A custom baffle can help you meet requirements.
Ready to craft your custom motorcycle baffle? Let’s gather our gear.
Step 1: Gather Your Materials and Tools
Before you start, make sure you have everything you need. This saves trips to the hardware store and keeps your workflow smooth. Think of this as your personal pit crew checklist for making a baffle for motorcycle exhaust.
1.1 Essential Materials
- Steel or Aluminum Tubing: This will form the core of your baffle. It needs to fit snugly inside your exhaust pipe. Measure your exhaust’s inner diameter carefully! A common size might be 1.5 to 2.5 inches in diameter.
- Metal Sheet/Plate: For creating end caps or mounting flanges. Steel or aluminum, roughly 1/8 to 1/4 inch thick, depending on rigidity needed.
- Sound-Dampening Material: High-temperature fiberglass packing, steel wool, or ceramic fiber matting. Ensure it’s rated for exhaust temperatures.
- Small Bolts/Screws/Rivets: For securing end caps or the baffle inside the exhaust. Stainless steel is best to resist rust.
- High-Temperature Paint (Optional): If you want to paint your baffle for aesthetics or corrosion resistance.
1.2 Essential Tools
- Measuring Tape or Calipers: For precise measurements of your exhaust and materials.
- Marker or Scribe: For marking cut lines.
- Metal Cutting Tools: Depending on your material:
- Angle grinder with metal cutting disc
- Hacksaw or reciprocating saw with a metal blade
- Tin snips (for thinner sheet metal)
- Drill and Metal Drill Bits: For making perforations in the tubing.
- Bench Vise: To hold materials securely while cutting or drilling.
- Safety Gear: Crucial! Safety glasses, work gloves, hearing protection, and a dust mask.
- Welder (Optional but Recommended): For a more robust and permanent assembly of components. If you don’t have one, you might need to rely more on bolts or rivets.
Pro Tip: When buying motorcycle parts or materials, always prioritize quality. You can learn more about things to know before buying motorcycle parts to ensure you get the right stuff for your project.
Visual guide about How to Make a Baffle for Motorcycle Exhaust 2026 Guide
Image source: whitedogbikes.com
Step 2: Measure Your Exhaust Pipe
Accuracy here is key! A well-fitting baffle is an effective baffle.
2.1 Measure the Inner Diameter (ID)
Carefully measure the inner diameter of your motorcycle’s exhaust pipe where the baffle will sit. This is typically at the end of the muffler. Use calipers for the most accurate reading, or a tape measure if that’s all you have. Your baffle’s tubing should be slightly smaller than this ID, allowing for a snug fit when wrapped with packing material.
2.2 Determine Baffle Length
Decide how long you want your baffle to be. A longer baffle generally provides more sound reduction. However, ensure it doesn’t obstruct exhaust flow too much or interfere with the muffler’s internal structure. A common length is typically 6-12 inches, but this can vary greatly depending on your exhaust. Remember, you might need to remove your exhaust to take these measurements properly. While you’re at it, consider if it’s time to clean a motorcycle carburetor for optimal engine performance.
Step 3: Cut and Form the Baffle Core
This is where your chosen tubing starts to look like a baffle!
3.1 Cut the Tubing to Length
Using your metal cutting tools (angle grinder or hacksaw), carefully cut your chosen tubing to the desired baffle length. Make sure the cut is as straight and clean as possible.
3.2 Create Mounting Points (If Applicable)
Some baffles are held in place by a single bolt through the muffler. If this is your plan, you’ll need to drill a small hole (e.g., 1/4 inch) near one end of the tubing. This hole will align with a corresponding hole you’ll drill in your muffler later.
Step 4: Drill Perforations
These holes are critical for both sound reduction and gas flow.
4.1 Mark Perforation Pattern
Using your marker, lay out a pattern of holes along the length of the tubing. A staggered pattern is often effective. The size and density of the holes influence both sound and performance:
- Smaller, more numerous holes: Generally better sound absorption but can restrict flow slightly more.
- Larger, fewer holes: Less sound absorption but better flow.
A good starting point is 1/4-inch to 3/8-inch holes, spaced about 1/2 to 1 inch apart.
4.2 Drill the Holes
Secure the tubing in your bench vise. Carefully drill all the marked perforations. Take your time to avoid slipping. Once drilled, use a deburring tool or a file to smooth out any sharp edges or burrs around the holes – this helps prevent snagging the packing material later.
Step 5: Prepare the End Cap (Optional but Recommended)
An end cap helps direct exhaust flow and can further reduce noise.
5.1 Cut the End Cap
Using your metal sheet, cut a circular piece that matches the outer diameter of your baffle tubing. You can trace the end of your tubing onto the sheet metal. For a simple design, you can make this a solid cap, or drill a central hole (1-1.5 inches) to allow some direct exhaust flow. This central hole helps maintain some performance and prevents excessive back pressure.
5.2 Attach the End Cap
Weld the end cap to one end of your perforated tubing. If you don’t have a welder, you can drill small holes around the perimeter of the end cap and the tubing, then secure it with small bolts or high-temp rivets. Ensure it’s a secure, robust connection.
Step 6: Add Sound-Dampening Material
This is where the magic happens for sound reduction.
6.1 Wrap the Baffle Core
Take your chosen sound-dampening material (fiberglass, steel wool, etc.). Carefully wrap it around the perforated tubing. You want a consistent, moderately dense layer. Don’t wrap it too tightly, as this can impede sound absorption. Aim for a thickness that allows the wrapped baffle to fit snugly inside your exhaust pipe.
6.2 Secure the Packing
Use high-temperature wire, thin stainless steel wire, or even duct tape (which will burn off during the first use but holds it in place for installation) to secure the packing material to the baffle core. This prevents it from unraveling during installation or while riding.
Step 7: Install and Secure Your Custom Baffle
Time to put your creation into your bike!
7.1 Insert the Baffle
Carefully slide the wrapped baffle into your motorcycle’s exhaust pipe. It should fit snugly. If it’s too tight, you might need to reduce some packing material. If it’s too loose, add a bit more packing or consider shims. Push it in until it’s seated firmly inside the muffler.
7.2 Secure the Baffle in Place
If you created a mounting hole in Step 3, align it with the corresponding hole in your muffler (you might need to drill this hole if it doesn’t exist). Insert a stainless steel bolt, washer, and nut to secure the baffle. For a cleaner look, some riders drill a small hole and use a self-tapping screw. Ensure it’s tight so the baffle doesn’t rattle or fall out.
Step 8: Test and Adjust
The moment of truth!
8.1 Start Your Motorcycle
Fire up your bike. Listen to the new exhaust note. Does it sound better? Is it quieter? Take it for a short ride to hear it under load. Pay attention to any strange noises or significant changes in engine performance.
8.2 Fine-Tuning
If it’s still too loud, you might try adding more packing material or a second, smaller baffle inside the first one (if space allows). If it feels choked or significantly underpowered, you might have too much backpressure. In this case, you might need to:
- Enlarge the central hole in the end cap.
- Drill more perforations.
- Reduce the amount of packing material.
Making a baffle for motorcycle exhaust is often a process of trial and error to get that perfect balance of sound and performance.
Troubleshooting Common Issues
Even with the best planning, sometimes things don’t go perfectly.
Issue: Baffle is Rattling
- Cause: Not secured tightly enough, or too loose inside the exhaust.
- Fix: Ensure the mounting bolt is tight. If the baffle core itself is loose, you may need to add more packing material to create a tighter fit against the exhaust wall.
Issue: Still Too Loud
- Cause: Insufficient sound-dampening, too few perforations, or too large an end cap opening.
- Fix: Add more fiberglass packing, or replace it with a denser material. Consider drilling smaller or more numerous perforations, or creating a smaller opening in the end cap.
Issue: Significant Loss of Performance / Engine Feels Choked
- Cause: Too much backpressure, possibly due to too much packing, too many small perforations, or too small an end cap opening.
- Fix: Increase the central hole size in the end cap. If that doesn’t help, you might need to drill more or larger perforations in the baffle tubing, or use less dense packing. This is often a balance, as reducing noise usually comes with some compromise on wide-open throttle performance.
Conclusion
Congratulations! You’ve successfully navigated the 2026 guide on how to make a baffle for motorcycle exhaust. This DIY project is a fantastic way to personalize your ride, achieve that ideal sound, and even optimize a bit of performance. Remember, safety, patience, and precise measurements are your best friends throughout this process. Now, go enjoy that perfectly tuned exhaust note on your next ride!